Rotary letterpress remains a practical choice for producing vivid, repeatable labels with tactile ink coverage. Its strengths become clear when artwork includes solid colors, fine type, and consistent registration across long runs. Smithers’ report, The Future of Labels and Label Printing to 2028, identifies packaging decoration and premium shelf appearance as continuing drivers for advanced label production. That trend gives rotary letterpress renewed relevance, despite strong competition from flexographic and digital presses.
This guide explains how to setup a rotary letterpress for multi-color label printing, from plate preparation to final inspection. The process begins with substrate selection, ink compatibility, cylinder condition, and accurate color separation. FINAT’s Radar reports continue to emphasize changing label demand, shorter production cycles, and pressure for dependable quality. These conditions make setup discipline more important than simply increasing press speed.
Small details matter. A clean plate helps. A stable web matters more. Operators should check impression pressure, drying behavior, and registration after every major adjustment. Color bars and a calibrated densitometer can reveal drift before customers notice it. However, no setup formula works perfectly for every press or material. Humidity, adhesive construction, ink viscosity, and worn gears can change the result. That limitation deserves attention.
The following sections combine practical pressroom experience with established inspection methods, helping operators build a repeatable workflow for sharp, multicolor labels.
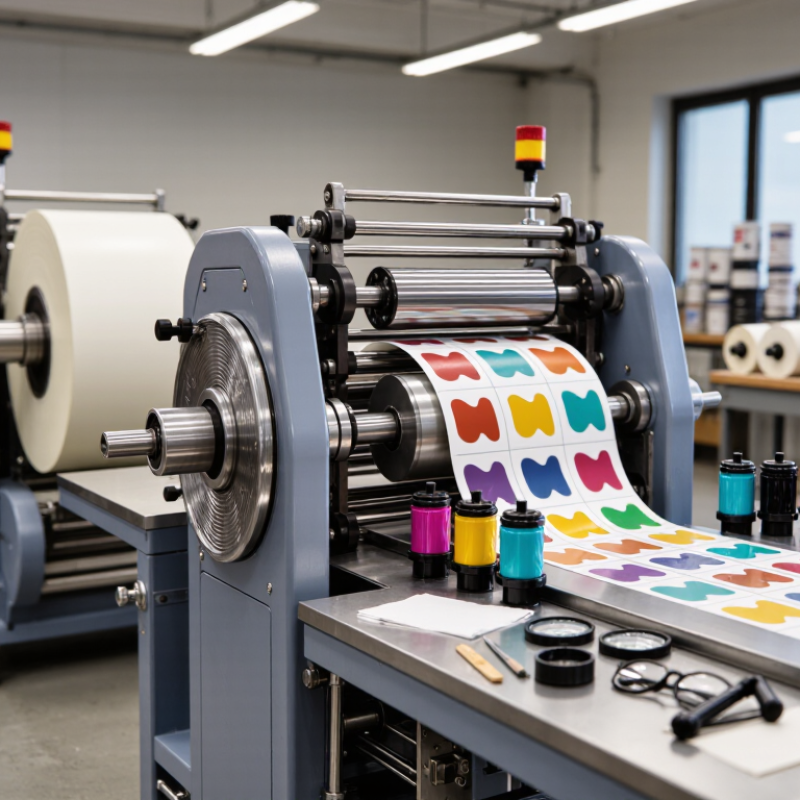
Setting up a rotary letterpress for multicolor labels starts with stable, well-matched equipment. You need an unwind stand, web guide, plate cylinders, impression cylinders, ink rollers, and a rewind unit. A registration control helps each color land accurately. Keep a reliable measuring gauge nearby. It catches small errors early.
The essential materials include photopolymer plates, label stock, compatible inks, mounting tape, and registration marks. Choose paper or film that suits the press and finished label. Ink viscosity affects coverage and drying time. Use approved cleaning solutions and keep their safety information accessible. A sharp plate-mounting tool also prevents uneven edges. I prefer checking plate thickness before installation, because a tiny difference can change pressure.
Before production, inspect the rollers for wear and remove dust from the web path. Thread a short test roll first. Adjust pressure gradually, not by guesswork. My first setup often showed color drift near the rewind section. The cause was usually web tension, not the plates. That lesson still matters. Compare the test sheet with a physical color proof under consistent lighting. Record pressure, ink settings, substrate, and plate details for repeat jobs. I still leave room for mistakes. Labels can look correct at the beginning, then shift after several hundred meters. Regular checks remain necessary.
| Category | Equipment or Material | Recommended Specification | Purpose in Multicolor Label Production | Typical Quantity | Important Setup Considerations |
|---|---|---|---|---|---|
| Press | Rotary letterpress | Web-fed or narrow-web rotary press with adjustable impression pressure and variable web speed | Feeds the label stock through one or more printing units and applies the raised image to the substrate | 1 press | Confirm the maximum web width, repeat length, printing speed, and number of available color stations before setup. |
| Printing Units | Printing cylinders or rotary plates | Relief plates or cylinders matched to the press repeat and plate cylinder circumference | Transfers each individual ink color to the label material | 1 per color | Each color requires a separate plate and printing position. Plate height and repeat must match the press specifications. |
| Plate Mounting | Plate mounting tape or adhesive system | Uniform-thickness, compressible tape suitable for rotary relief printing | Secures the plate to the cylinder and helps control impression consistency | As required | Use the same tape thickness across corresponding color stations to reduce variation in print pressure and dot gain. |
| Ink System | Letterpress ink | Fast-drying, substrate-compatible ink formulated for narrow-web relief printing | Creates the visible color layers in the label design | 1 ink per color | Check drying behavior, opacity, adhesion, and compatibility with the selected label stock before the production run. |
| Ink System | Ink rollers and roller settings | Clean, resilient rollers adjusted for even ink distribution and controlled ink film thickness | Distributes ink evenly from the ink fountain to the printing plate | 1 set per unit | Incorrect roller pressure can cause uneven coverage, excessive ink transfer, plate wear, or poor fine-detail reproduction. |
| Substrate | Pressure-sensitive label stock | Coated or uncoated face material with a stable release liner and a thickness compatible with the press | Provides the printable surface and adhesive-backed label construction | 1 production roll | Verify web width, roll diameter, liner release, surface energy, caliper, and resistance to ink solvent or drying conditions. |
| Web Handling | Unwind and tension-control system | Adjustable unwind brake or motorized unwind with web-guiding capability | Keeps the label web aligned and maintains stable tension through every color station | 1 system | Excessive tension can stretch the web and disturb registration; insufficient tension can cause wrinkles and tracking problems. |
| Registration | Color-to-color registration controls | Manual or automatic lateral and circumferential adjustment with printed registration marks | Aligns each color layer to create a sharp, accurately registered image | 1 control system | Allow registration marks outside the finished label area and inspect alignment at operating speed, not only at startup. |
| Drying | Interstation or end-of-press drying unit | Air, infrared, or other drying method compatible with the ink and substrate | Reduces setoff, smearing, blocking, and ink transfer during rewinding | As required | Drying requirements depend on ink chemistry, ink film thickness, press speed, ambient temperature, and substrate absorbency. |
| Die Cutting | Rotary die-cutting station | Magnetic or solid rotary die system matched to the label shape, repeat, and liner construction | Cuts the label face material without cutting through the release liner | 1 station | Set the die depth carefully. Excessive pressure can damage the liner and create dispensing or matrix-removal problems. |
| Waste Removal | Matrix stripping and waste rewind unit | Adjustable matrix-removal roller and waste rewind with stable tension control | Removes the waste material surrounding the die-cut labels | 1 system | Keep the stripping angle and rewind tension stable to prevent label lifting, web breaks, or incomplete waste removal. |
| Rewinding | Finished-roll rewinder | Adjustable core holder with controlled winding tension and edge alignment | Produces finished rolls that can be stored, transported, or applied to products | 1 unit | Use a consistent winding tension to prevent telescoping, crushed cores, loose rolls, and label-edge distortion. |
| Quality Control | Color and registration inspection tools | Inspection light, magnifier, ruler or caliper, and registration reference sheet | Checks color consistency, image sharpness, print position, and repeat accuracy | 1 inspection set | Inspect the first approved roll, samples during production, and the final roll. Record press speed, ink settings, and registration adjustments. |
| Cleaning | Press-cleaning materials | Lint-free wipes, approved roller cleaner, plate cleaner, scrapers, and waste containers | Removes residual ink and prevents contamination between colors or production jobs | 1 working set | Use cleaning agents recommended for the specific plate, roller, and press components. Dispose of solvent-contaminated waste safely. |
| Safety | Personal protective equipment | Safety glasses, protective gloves suitable for ink handling, hearing protection, and non-slip footwear | Reduces exposure to moving parts, ink, cleaning chemicals, and operating noise | For each operator | Keep guards in place, isolate power before maintenance, and follow the safety data instructions for inks and cleaning chemicals. |
Use a clean, dry cylinder. Inspect surfaces for dust, dents, and adhesive residue. Even one particle can shift a plate.
Mark the reference line before mounting the first plate. Use it to position every later plate consistently. Keep it clean.
Install the lightest color first. Add darker colors afterward. This sequence makes registration errors easier to identify.
Measure each plate edge against the cylinder marks with a thin steel rule. Inspect registration crosses with a loupe. Small details matter.
Reduce impression pressure and change one setting at a time. Adjusting pressure and plate position together creates confusion. Slow tests help.
Measure the ink film instead of judging brightness alone. Set the lightest pressure that provides complete coverage. Excess pressure can blur halftone dots.
Use the first color as the reference. Check the lead edge, center, and operator side. Recheck after speed changes.
Check plate tension, cylinder cleanliness, web movement, heat, and substrate stretch. Paper movement may appear minor. It can still shift several millimeters.
Keep a setting sheet for each substrate. Record ink, pressure, speed, and ambient temperature. Note every adjustment beside its color.
I sometimes chase a tiny registration error too long. Uneven ink coverage may remain unnoticed. Inspect the whole label, not only registration marks.
This guide explains how to setup a rotary letterpress for multi-color label printing, from preparing the workspace to completing a consistent production run. It covers the essential equipment and materials, including a properly maintained press, suitable label stock, printing plates, inks, registration tools, and cleaning supplies. Before printing, the press should be inspected, adjusted, and loaded with label stock that matches the project’s size, thickness, and finish requirements.
The process then focuses on installing and aligning plates for each ink color, setting the correct ink flow and impression pressure, and carefully checking color registration. A series of test impressions helps identify issues such as uneven coverage, smudging, or misalignment. By making gradual adjustments to plate position, pressure, ink levels, and stock feeding, operators can achieve clean, balanced multicolor labels. Once the results are stable, the press can be run at a controlled speed while regularly monitoring quality throughout the final production.

 Moveco Machine