China Top 10 How to Prevent Doctor Blade Streaks?

Time:2026-10-09 Author:Oliver
0%

Flexographic printing is moving toward tighter quality control, shorter runs, and faster press changes. Smithers’ Future of Flexible Packaging to 2028 projects continued global growth in flexible packaging, increasing pressure on printers to reduce waste and protect delivery schedules. In this environment, a thin streak across a film roll is not a minor defect. It can trigger rewinding, inspection, customer complaints, and lost production time.

The doctor blade often reveals problems before the press operator sees them. Dried ink, uneven blade loading, excessive pressure, worn edges, poor chamber sealing, and damaged anilox cells can all create streaks. Paul Sharkey of FLXON describes the doctor blade as “the heart of the flexographic press.” That simple observation deserves attention. A blade is small, but its effect is visible across thousands of meters of printed material.

This guide examines how to prevent doctor blade streaks in flexo printing machines through practical checks and measurable controls. Recommendations are aligned with flexographic best practices discussed in FTA FIRST guidance and technical publications from the Flexographic Technical Association. Operators should inspect the blade edge under proper lighting, confirm consistent contact pressure, filter the ink, and verify anilox cleanliness before increasing press speed. Small details matter.

No checklist is perfect. Real production conditions vary. A blade that performs well on one press may fail on another because of ink chemistry, substrate texture, or chamber design. Careful records, controlled trials, and honest review remain essential. When streaks appear, replacing the blade immediately may hide the cause instead of solving it.
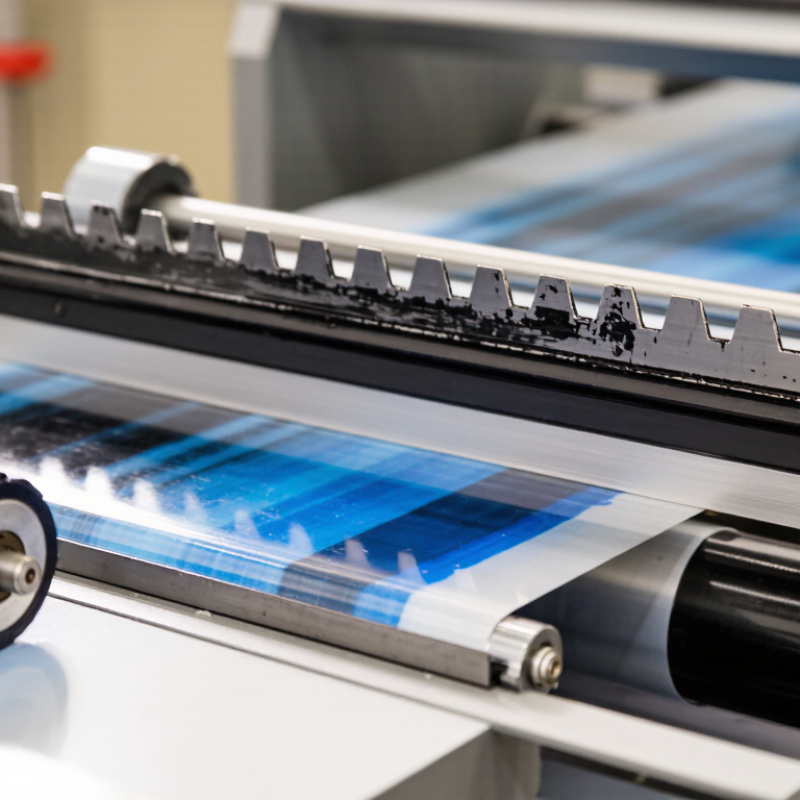
China Top 10 How to Prevent Doctor Blade Streaks?

What Causes Doctor Blade Streaks in Printing and Coating?

China Top 10 How to Prevent Doctor Blade Streaks?

Doctor blade streaks usually begin with contamination, uneven pressure, or damaged blade edges. A tiny dried ink particle can create a continuous line across the web. Excessive blade pressure may worsen the mark by forcing debris into the metering zone. The Flexographic Technical Association’s 2023 industry report identifies process consistency and press maintenance as major productivity concerns. That finding fits the shop floor: streaks often appear after long runs, not during initial setup.

Viscosity and temperature also matter. As ink warms, its flow changes, and unstable rheology can leave alternating heavy and light bands. Poorly filtered ink is another common cause. Operators should inspect filters, blade holders, seals, and the chamber before adjusting pressure. The Flexographic Technical Association’s 2023 industry report identifies process consistency and press maintenance as major productivity concerns. A 2024 Smithers market outlook estimates global printed packaging demand at more than 500 billion US dollars, so a small defect can affect substantial material volumes. The number is impressive, but it also exposes a weakness: production speed can hide gradual blade wear.

Blade angle and contact length require careful control. A practical starting range is often about 25 to 35 degrees, but each coating system behaves differently. That range is not a promise. Stainless steel or ceramic blades may react differently to abrasive pigments and high-solids coatings. In my experience, replacing a blade too late is more expensive than replacing it early. Still, teams sometimes change blades without checking the ink, cylinder surface, or mounting alignment. That habit needs reconsideration.

How to Inspect and Prepare the Doctor Blade System

Preventing doctor blade streaks begins with a disciplined inspection of the entire blade system. Shut down the machine and follow its energy isolation procedure. Remove dried ink, dust, and adhesive residue from the holder. Even a small particle can create a repeating line across the web.

Inspect the blade edge under angled light. Look for nicks, burrs, bends, corrosion, or uneven wear. Run a clean cotton swab gently along the edge, without applying force. If fibers catch, the edge may be damaged. Check the holder for distortion and confirm that clamps apply even pressure. The blade should sit straight, with consistent contact across the roll. A quick visual check is not enough.

Preparation also includes the ink, roll, and operating area. Clean the metering roll with a suitable solvent and a lint-free cloth. Confirm that the ink has the correct viscosity and contains no dried particles. Measure blade extension with a gauge when possible. Small differences can change contact pressure and cause streaks. I have seen operators replace a blade too quickly, while the real problem was a dirty holder. That mistake is easy to repeat. Record the inspection findings, including wear locations and machine settings. These notes help separate mechanical faults from process changes and support more reliable adjustments.

How to Select and Install the Right Doctor Blade

China Top 10 How to Prevent Doctor Blade Streaks?

Selecting the right doctor blade starts with the coating, not the machine. Match blade material, thickness, bevel, and tip geometry to viscosity, speed, and substrate roughness. A harder blade can improve metering, but it may damage a rough cylinder. A softer blade may reduce wear, yet create unstable coating weight. Smithers’ 2024 flexible packaging outlook projects roughly 4% annual market growth through 2029. That pressure makes repeatable blade selection increasingly important.

Installation requires clean contact and controlled pressure. Wipe the holder, inspect the backing, and remove dried coating from every mounting surface. Set the blade parallel to the roll, then adjust the contact angle gradually. Excessive pressure often hides poor alignment. It also accelerates edge wear. TAPPI technical guidance on coating operations emphasizes consistent blade loading and accurate alignment as key variables in metering control. Small errors matter.

In production, I check the streak pattern before changing machine settings. A single line near the operator side may indicate local contamination or a damaged tip. Repeated lines across the web may suggest incorrect blade curvature or pressure. Record blade life, speed, coating weight, and defect location. Do not trust memory. We sometimes replace blades too quickly, when cleaning the holder would solve the problem. A perfect setup on paper can still fail after temperature changes. That is worth reviewing.

How to Adjust Blade Pressure, Angle, Speed, and Ink Flow

Doctor blade streaks often begin with small setting errors. During pressroom inspections, I check pressure, angle, speed, and ink flow together. Changing one setting can hide the real cause.

Set blade pressure only high enough to remove excess ink. Excess pressure bends the blade and creates uneven contact. Start with a light setting, then increase it gradually. Inspect the printed web under steady lighting. A narrow dry line may indicate insufficient pressure. A wide scuffed line often suggests excessive pressure.

The blade angle must match the chamber and coating condition. A steeper angle can improve wiping, but it may increase wear. Keep the angle consistent across the full working width. I once blamed contaminated ink for repeated streaks. The actual cause was a slightly uneven blade holder. That assumption was wrong.

Control press speed after stabilizing the blade settings. Higher speed can pull ink beneath the blade and leave fine trails. Reduce speed briefly to confirm this behavior. Then adjust gradually, not sharply. Ink flow also matters. Low flow can expose dry areas, while excessive flow overloads the wiping zone. Check viscosity, temperature, and return flow before changing the blade. Use a clean sample and record every adjustment. I sometimes skip detailed notes during urgent production, and that makes later troubleshooting slower. Consistent records reveal patterns that eyesight alone may miss.

China Top 10 How to Prevent Doctor Blade Streaks? - How to Adjust Blade Pressure, Angle, Speed, and Ink Flow

No. Adjustment Area Typical Streak Symptom Recommended Starting Range Corrective Action What to Avoid Expected Result
1 Doctor Blade Pressure Continuous lines, uneven ink removal, or a heavy ink film near the blade contact area. Reduce pressure gradually if streaks appear with excessive blade loading. Increase pressure slightly only when residual ink remains on the non-image areas. Do not compensate for a damaged or contaminated blade by applying excessive pressure. A stable wiping line, lower blade wear, and more consistent ink coverage.
2 Blade Angle Fine longitudinal streaks, irregular wiping, or unstable ink transfer across the web. Adjust the angle in small steps of approximately 1–2°. A slightly more open angle can reduce aggressive wiping; a more closed angle can improve excess-ink removal. Do not make large angle changes while the press is running at high speed. More uniform contact and reduced sensitivity to small surface irregularities.
3 Press Speed Streaks become more visible as speed increases, especially during acceleration. Confirm pressure, angle, ink viscosity, and drying conditions at a lower speed before increasing speed in steps of 5–10%. Do not change speed, pressure, and ink viscosity simultaneously. Better identification of the true source of streaks and smoother production ramp-up.
4 Ink Viscosity Streaks caused by poor flow, unstable transfer, or excessive ink accumulation at the blade. Measure viscosity and temperature regularly. Add solvent or approved reducer only in controlled amounts and allow sufficient mixing time before retesting. Do not judge viscosity by appearance alone or add solvent without measuring the result. More stable ink flow, improved transfer, and reduced blade-line variation.
5 Ink Temperature Streak intensity changes during the shift or increases as the ink cools. Control room and ink circulation temperature. Recheck viscosity after the ink reaches operating temperature. Do not make viscosity corrections before temperature has stabilized. Consistent viscosity and more predictable blade wiping throughout the run.
6 Blade Edge Condition One or more fixed streaks remain in the same cross-web position. Inspect the edge under magnification during every planned setup check. Install the blade without twisting and keep the edge parallel to the cylinder. Do not reuse a blade with a damaged edge or attempt to polish it during production. Reduced fixed-line defects and more even contact across the working width.
7 Blade Holder Alignment Streaks appear at one side of the cylinder or vary when the holder is moved. Check mounting bolts, holder straightness, oscillation settings, and lateral positioning. Correct alignment before changing ink settings. Do not tighten one side substantially more than the other. Uniform blade loading and reduced cross-web pressure variation.
8 Ink Flow and Circulation Intermittent streaks, foaming, ink starvation, or uneven ink levels in the chamber or tray. Clean filters, confirm pump capacity, remove trapped air, and keep return lines unobstructed. Use a stable ink feed rather than repeatedly adding small amounts by hand. Do not operate with a low ink level, blocked filter, or visible foam at the blade contact zone. Smoother ink supply and fewer intermittent lines caused by turbulence or starvation.
9 Cylinder and Blade Cleanliness Random streaks, repeating marks, or defects that move after cleaning. Stop safely, clean with a compatible approved solvent, inspect the cells and seals, and remove all lint before restarting. Do not use metal tools that can scratch the cylinder or blade edge. Fewer random defects and more stable ink transfer across the print repeat.
10 Substrate, Tension, and Drying Balance Streaks are accompanied by wrinkles, flutter, ink set-off, or unstable registration. Check unwind and rewind tension, nip pressure, air balance, and drying airflow. Verify that the substrate surface is clean and compatible with the ink. Do not increase drying temperature or tension excessively to hide a blade or ink-flow problem. Improved web stability, cleaner transfer, and fewer defects caused by vibration or incomplete drying.

How to Troubleshoot Streaks and Prevent Their Recurrence

China Top 10 How to Prevent Doctor Blade Streaks?

How to Troubleshoot Streaks and Prevent Their Recurrence

Doctor blade streaks often appear as thin lines running in the machine direction. Start by marking their positions on the web. Compare the marks with the blade edge, chamber seals, and backing roll. This simple check can separate a blade problem from a coating or substrate problem.

Stop the press safely and inspect the blade under steady light. Look for nicks, dried coating, uneven wear, or a curled edge. Even a small particle can create a persistent line. Clean the blade holder and remove residue from the chamber. Check blade pressure across the working width. Excessive pressure may increase wear, while low pressure can cause unstable contact. Both conditions can look similar.

Review coating viscosity, temperature, and filtration records. A sudden viscosity change can overload one section of the blade. Poorly dispersed particles may gather near the edge. Confirm that the substrate is flat and free from dust. Do not replace the blade immediately every time. That habit can hide the real cause. A controlled trial with a clean blade, adjusted pressure, and filtered coating gives better evidence. Record the settings and the exact streak location. Recurrence usually follows a missed detail. Sometimes, that detail is a rushed cleaning step.

FAQS

What commonly causes streaks in printing and coating?

Contamination, uneven pressure, damaged edges, and unstable ink flow are frequent causes. Tiny particles matter.

How can operators inspect a doctor blade safely?

Shut down the machine and follow its energy isolation procedure. Inspect the edge under angled light for nicks, burrs, bends, and corrosion.

How does dried ink create a continuous streak?

A small dried particle can remain in the holder or metering zone. It then drags across the moving web and produces a repeating line.

What should be checked before changing blade pressure?

Inspect the blade holder, seals, filters, roll surface, and mounting alignment first. Pressure is not always the answer.

How do viscosity and temperature affect coating quality?

Warmer ink may flow differently and create alternating heavy and light bands. Measure viscosity during production, not only during setup.

What blade angle is a practical starting point?

Many systems begin near 25 to 35 degrees. This range is only a starting point, because coating systems behave differently.

How should a replacement doctor blade be installed?

Clean every mounting surface and remove dried coating from the holder. Set the blade parallel to the roll, then increase contact gradually.

What can streak patterns reveal about the problem?

One line near the operator side may indicate local contamination or tip damage. Several repeating lines may suggest incorrect curvature, pressure, or alignment.

When should a doctor blade be replaced?

Replace it when the edge shows uneven wear, burrs, corrosion, or fiber-catching damage. Replacing too early wastes material. Waiting too long can waste an entire run.

What production records help prevent recurring streaks?

Record blade life, speed, coating weight, temperature, settings, and defect location. Do not trust memory. Notes may expose a gradual problem.

Conclusion

Doctor blade streaks in printing and coating are often caused by uneven blade wear, dried ink, damaged edges, poor substrate cleanliness, incorrect pressure, or unstable ink flow. Effective prevention begins with a careful inspection of the blade, holder, chamber, seals, and anilox or coating surface. Clean all components thoroughly, remove particles, and confirm that the blade is straight, properly aligned, and suitable for the ink, coating, and production speed. Replacing worn or nicked blades before operation can also prevent recurring lines and uneven coverage.

To understand how to prevent doctor blade streaks in flexo printing machines, operators should adjust blade pressure gradually rather than applying excessive force. The blade angle, machine speed, ink viscosity, and circulation rate must work together to maintain stable metering. If streaks appear, stop and identify whether the cause is contamination, mechanical damage, incorrect settings, or inconsistent ink delivery. Recording successful settings, following a regular cleaning schedule, and inspecting the system between jobs will help maintain consistent print quality and reduce repeat defects.

Oliver

Oliver

Oliver is a seasoned marketing professional with a wealth of expertise in driving brand awareness and engagement. With a deep understanding of our company's product offerings, he consistently delivers high-quality content that enriches our professional blog. His insights not only shed light on......