5 Best Ways to Upgrade an Old Letterpress for UV Curing?

Time:2026-11-09 Author:Charlotte
0%

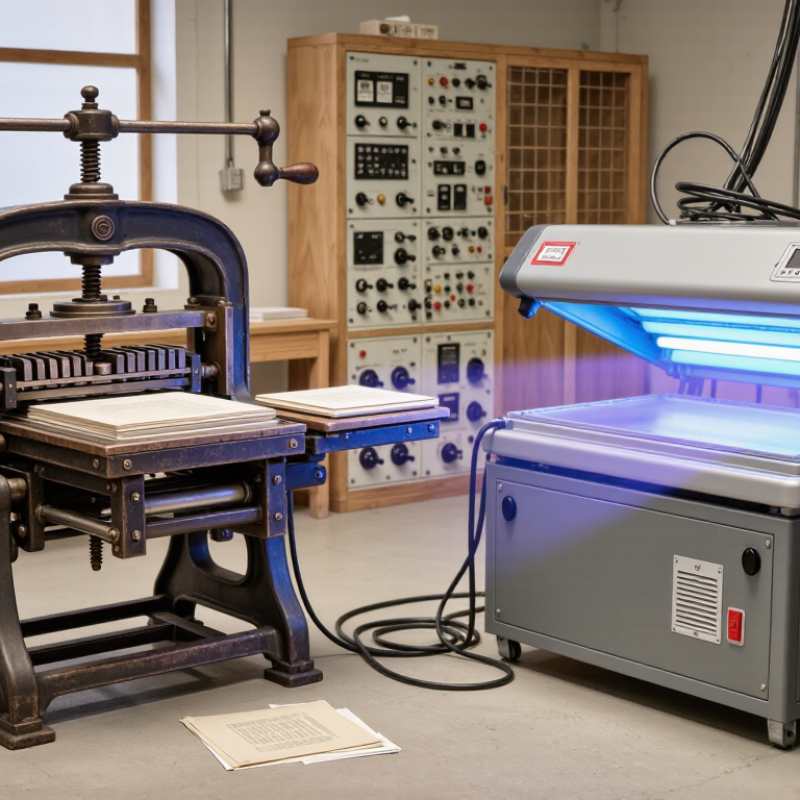
An old letterpress can still produce crisp type, deep impressions, and distinctive work. Yet slow drying may limit turnaround, especially when sheets stack beside the press. UV curing can address that bottleneck, but a retrofit is not simply a lamp bolted above the bed. The key question is how to upgrade an old letterpress machine to support UV curing without compromising print quality, operator safety, or the press itself.

Industry sources help frame the decision. Smithers’ report, The Future of UV/EB Curing: Market Forecasts to 2028, examines demand and applications for ultraviolet and electron-beam curing. RadTech’s industry research also tracks UV/EB technology across printing and other manufacturing sectors. These sources provide market context, not a guarantee that every historic press is suitable. That distinction matters. A worn feed system, limited guarding, or heat-sensitive stock can change the economics quickly.

This guide compares five practical upgrade paths: selecting compatible UV inks, choosing an LED or conventional UV system, integrating power and controls, adding shielding and interlocks, and validating curing with production tests. EPA guidance on UV/EB curing describes the technology’s potential to reduce solvent-related emissions in suitable processes; actual results depend on materials and setup. Start with measurements. Check clearance, electrical capacity, sheet speed, and substrate response before buying equipment. Some retrofits will disappoint. Careful trials can reveal that early.
5 Best Ways to Upgrade an Old Letterpress for UV Curing?

Assess the Letterpress’s Condition and Electrical Capacity

Before adding a UV unit, inspect the press as carefully as its power supply. Check motor nameplates, wiring insulation, grounding, control cabinets, and the condition of switches. Look for cracked insulation, heat-darkened terminals, oil, and paper dust near electrical components. Small warning signs matter. A press that runs smoothly may still have aged wiring or an overloaded circuit.

The U.S. Department of Energy’s 2014 report, Improving Motor and Drive System Performance: A Sourcebook for Industry, estimates that motor-driven systems use about 54% of U.S. manufacturing electricity. That figure is not a press-specific load estimate, but it shows why the existing motor and proposed UV equipment must be assessed together. Record the press’s voltage, phase, full-load current, and available circuit capacity. Then compare them with the curing unit’s rated load and starting current. Don’t rely on an old fuse rating alone. A qualified electrical professional can check the panel, protective devices, grounding, and voltage drop under operating load. Leave room for ventilation and safe access around the lamp housing. One overlooked detail: older machines may have undocumented wiring changes, so trace the circuit before planning the retrofit.

Assess the Letterpress’s Condition and Electrical Capacity

The scores are an illustrative 1–5 planning rubric, not measured machine data or electrical specifications. Inspect the press and check its nameplate, supply voltage, phase, current demand, wiring, and grounding before selecting UV equipment. Have a qualified electrician verify circuit capacity and electrical safety; requirements vary by press, UV system, and local code.

Select a UV Curing System Compatible with the Press

An old letterpress needs a curing system that fits its geometry, not simply the most powerful lamp available. Measure the bed, print area, lamp clearance, and available electrical supply before selecting equipment. RadTech’s UV-LED technical guidance identifies 365, 385, 395, and 405 nm as common output wavelengths. Match the lamp’s wavelength to the ink’s photoinitiator; a mismatch can leave thick ink tacky, even when the surface looks dry. Check the press’s maximum sheet size and intended running speed against the system’s rated curing width and dose.

Tips: Ask for measured irradiance and dose at the actual print surface, not just the lamp window. Test a small run with your stock and ink. Measure twice.

A compact LED unit may suit a narrow platen, while a wider press may need more coverage or multiple heads. Confirm that the lamp can be mounted without blocking rollers, guides, or operator access. Also check heat exposure: older substrates can curl or discolor, and a slower pass is not always a safe fix. Keep a baseline of current speed, ink coverage, and cure results. Then compare it with trial measurements. Real press conditions are uneven; the first estimate may be wrong.

Install and Align UV Lamps or LED Curing Units

Before mounting a UV lamp or LED curing unit, measure the open space around the press bed, grippers, and delivery path. Older letterpress frames can have uneven clearances. A few millimetres matter when sheets move quickly. Fix the curing head to a rigid bracket, not a vibrating guard. Keep cables clear of moving parts. An awkward retrofit is not unusual.

Set the lamp square to the sheet path and centred across its width. Use a straightedge to check alignment, then run test sheets at low speed. Look for pale edges, tacky patches, or heat marks. These can reveal uneven exposure. Measure output with a suitable radiometer, and confirm that its range matches the lamp’s wavelength. Ink chemistry matters too. A lamp can shine brightly and still cure the wrong ink.

Leave room for adjustment. Small changes in height or angle can shift the cure across the sheet. Check the unit again after the press warms up; brackets may move slightly. Install shielding and interlocks, and have a qualified technician handle electrical connections. Provide appropriate ventilation, especially with systems that produce heat or ozone. Keep a maintenance note with lamp hours, measured output, and test results. I would not trust a single perfect-looking sheet. Run a short batch, inspect both sides, and repeat after adjustments.

Adapt Inks, Coatings, and Materials for UV Curing

An old letterpress may handle UV curing well, but its inks cannot be swapped blindly. UV-curable inks need a curing source whose output matches their requirements. Check the ink supplier’s technical data, then confirm the press’s rollers and other contact surfaces are compatible. Some older materials may soften or swell. That detail is easy to miss.

Coatings need equal care. A UV coating can add gloss or scuff resistance, yet adhesion depends on the paper surface and the ink beneath it. Test the full stack, not just each material alone. Print a small batch on the intended stock, cure it, and check for lifting, cracking, or poor rub resistance. Watch the edges closely.

Substrates can change the result. Uncoated paper absorbs differently from coated board, while plastic films may need surface treatment for reliable adhesion. Keep ink films consistent and adjust curing conditions within the supplier’s guidance. A sheet that feels dry may still be undercured. It happens. Record settings and results, even when a test fails; those notes help narrow the cause. Use proper shielding around UV equipment, and follow its operating instructions. A perfect-looking proof is not proof of durable adhesion.

Add Safety Guards, Interlocks, and Curing Controls

An old letterpress needs more than a UV lamp bolted above the bed. Fit a fixed shield around the curing zone, including side gaps where reflected light can escape. Add an interlock that cuts lamp power when the guard opens. The press may still coast or cycle after a stop, so test the interlock under real operating conditions. No bypass switches.

Exposure limits depend on wavelength. The ICNIRP 2004 ultraviolet guidelines set an eight-hour effective exposure limit of 30 J/m² for unprotected eyes and skin. That is a spectrally weighted dose, not a direct lamp setting. IARC’s Monographs Volume 100D identifies ultraviolet radiation as carcinogenic to humans. Have a qualified technician measure leakage around the closed guard, then record the results.

Curing controls matter just as much. Install a timer and a clear, repeatable setting for lamp output and press speed. Check dose with a calibrated UV radiometer at the substrate plane; ink color, lamp distance, and reflector wear can change results. Keep a simple log of readings and test prints. It is tempting to trust a clean-looking cure. That can be a mistake. Recheck after maintenance, and stop the press if a guard or interlock fails.

FAQS

How do I choose a curing system for an old letterpress?

Measure the press bed, print area, lamp clearance, and electrical supply. Match the curing width and rated dose to your sheets and running speed. Measure twice.

Which lamp wavelength should I select?

Match the lamp wavelength to the ink’s photoinitiator. Common options include 365, 385, 395, and 405 nm. A mismatch can leave thick ink tacky.

What should I test before full production?

Run a small test using your actual stock and ink. Check curing at the print surface, not only near the lamp. The first estimate may be wrong.

Can a curing lamp damage older paper or other stock?

Yes. Heat can make some materials curl or discolor. Compare trial results at your normal speed and ink coverage.

What safety features should the curing area have?

Fit a fixed shield around the curing zone, including its side gaps. Add an interlock that cuts lamp power when the guard opens. No bypasses.

How can I check whether the ink is fully cured?

Use a calibrated UV radiometer at the substrate plane. Lamp distance, ink color, and reflector wear can change the measured dose.

What should happen if the guard or interlock fails?

Stop the press and repair the fault before operating again. Test the interlock under real press conditions, since the machine may continue moving briefly.

How should curing settings be maintained?

Record lamp output, press speed, dose readings, and test-print results. Recheck after maintenance. A clean-looking surface can still be misleading.

Conclusion

Upgrading an older letterpress for UV curing starts with a careful assessment of the press’s mechanical condition, electrical capacity, and available installation space. This helps determine whether the machine can safely support new curing equipment and whether electrical or structural improvements are needed. The next step in how to upgrade an old letterpress machine to support UV curing is choosing a UV lamp or LED system that suits the press’s speed, print width, and production needs.

After installation, align the curing units so they provide consistent coverage without interfering with press operation. Test compatible inks, coatings, and substrates, adjusting settings to achieve reliable curing and good print quality. Finally, add suitable guards, interlocks, and curing controls, then verify that operators can use the upgraded press safely and consistently. A staged approach helps preserve the machine’s useful capabilities while preparing it for UV-curable printing.

Charlotte

Charlotte

Charlotte is a seasoned marketing professional with a deep understanding of the company's portfolio and a passion for elevating its presence in the market. With a keen eye for detail and a commitment to excellence, she ensures that our professional blog is regularly updated with insightful articles......