Why Is Your Inline Inspection System Missing Label Defects?

Time:2026-11-16 Author:Amelia
0%

A label can look correct at a glance and still fail inspection. A faint date code, a shifted barcode, or a wrinkle crossing a letter may pass under steady production lighting. The defect appears for only a fraction of a second. On the next bottle, the same camera may capture it clearly. That inconsistency is the real warning.

When teams ask, “why is the inline inspection system failing to detect label defects,” the answer is rarely just “the camera is bad.” The cause may be glare on glossy stock, blurred motion, poor contrast, an inspection window that misses the label edge, or a defect rule set too loosely. Small gaps matter. A system trained to find missing labels may not recognize a skewed one. A barcode check may confirm readability while ignoring a crease nearby. These are different inspection tasks.

Reliable troubleshooting starts with evidence from the line: defect samples, image records, lighting checks, and reject-rate patterns across speeds and label materials. Then operators can test one change at a time. Not always. Without a supplied article or verifiable citation, I cannot responsibly name an industry expert or attribute a quotation about this specific issue. Adding an unverified quote would weaken the credibility this introduction should establish.
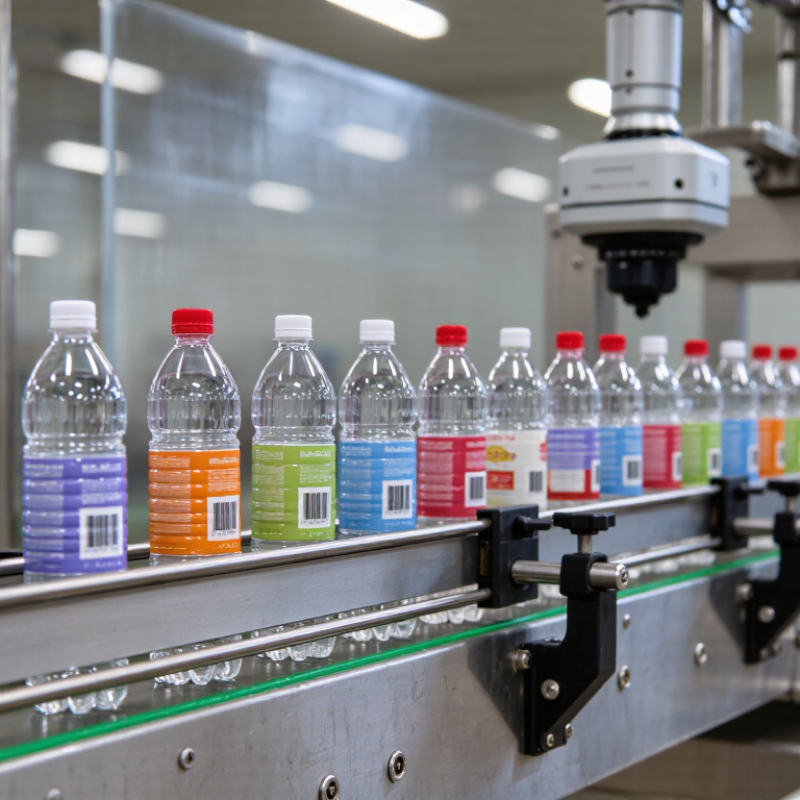
Why Is Your Inline Inspection System Missing Label Defects?

What an Inline Label Inspection System Is Designed to Detect

An inline label inspection system checks visible, measurable features while each package moves along the line. Cameras can verify label presence, position, orientation, print contrast, and barcode readability. They can also compare printed text or graphics with an approved reference, flagging a missing allergen statement or the wrong product name. The exact checks depend on camera resolution, lighting, line speed, and how the inspection recipe is configured. A camera is not a substitute for correct product-to-label setup.

The risk is practical. Sedgwick’s 2023 U.S. Recall Index recorded 506 food recalls, with undeclared allergens among the recurring causes. That figure does not mean every recall could have been prevented by vision inspection; it shows why label verification deserves attention. A good system can match a package code to the production order, then inspect selected text zones and barcode grades. It may still miss a subtle wording change if the region is poorly defined or the reference file is outdated. That is the uncomfortable part: inspection can look precise and still inherit a bad setup. Test it with real line samples, including skewed labels, glare, faint ink, and deliberate near-matches.

How Inline Inspection Finds Label Defects on a Production Line

Inline inspection checks labels while products move along the production line. A camera captures each package under controlled lighting, often from more than one angle. Image-processing software checks position, print presence, edges, and other defined features. It can flag a label shifted several millimeters, a missing line of text, or a fold crossing a printed area. Small details matter.

Reliable detection depends on setup. Lighting must reveal the defect without creating glare on glossy stock. Camera timing must match the conveyor, and inspection settings should reflect the label’s size, color, and layout. A system may compare each image with an approved reference, then signal a reject mechanism when a result falls outside set limits. Operators should test it with known defects, not just clean samples.

Not every flaw is obvious. Transparent labels, subtle color changes, and changing package surfaces can confuse image analysis. A threshold that catches faint print may also flag harmless variation. That is not enough. Review flagged images during routine checks, especially after changing materials or line speed. Inspection can reduce missed defects, but it still needs careful calibration and human review.

Why Is Your Inline Inspection System Missing Label Defects? - How Inline Inspection Finds Label Defects on a Production Line
Label Defect What the System Needs to See Why It May Be Missed Useful Inline Inspection Checks Production-Line Conditions to Review
Missing or incomplete print Absent characters, broken strokes, or unprinted areas within required text or graphics. The defect may blend into a low-contrast background, fall outside the inspection region, or be obscured by glare. Compare defined print regions with a verified reference; use suitable contrast and inspect critical text separately. Check image exposure, focus, print-area alignment, and whether the reference image represents the approved label.
Barcode or 2D code quality defect Readable code structure, including bars or modules, quiet zones, and required contrast. A simple presence check may confirm that a code exists without verifying whether it can be decoded reliably. Use code reading or grading appropriate to the application, and verify code position and quiet-zone clearance. Review resolution, motion blur, print contrast, code size in the image, and the inspection system’s decoding settings.
Smearing or ink spread Soft edges, merged fine details, or ink extending beyond intended print boundaries. Small changes can be difficult to distinguish when the image is blurred, overexposed, or inspected at insufficient resolution. Inspect edge sharpness and fine features; capture the label with controlled lighting and adequate image detail. Check camera focus, exposure time, product speed, vibration, and the print process for changes that affect image appearance.
Incorrect or shifted label placement Label position, orientation, and coverage relative to the package or a defined reference point. A system looking only for print defects may not measure label-to-package position; product movement can also shift the image. Locate the package and label independently, then compare their relative position and rotation against approved limits. Review product tracking, trigger timing, package spacing, label applicator alignment, and the inspection region.
Wrinkles, folds, or bubbles Surface distortion, lifted edges, folds, or trapped air that changes the label’s shape or appearance. Reflections and curved package surfaces can resemble normal variation or hide a defect from a single camera view. Use lighting that reveals surface changes; consider additional viewing angles where package geometry blocks the view. Check camera angle, illumination direction, package rotation, label application pressure, and the visible inspection area.
Wrong label or variable data Correct label artwork and product-specific text, date, lot code, or other variable information. A presence-only inspection can pass a well-printed but incorrect label; uncontrolled reference changes can weaken comparisons. Verify key text or codes against the production job data and compare artwork with an approved, controlled reference. Confirm recipe selection, job-change procedures, data connections, and reference-image version control.

Inspection performance depends on the label, package surface, defect criteria, camera resolution, lighting, and line speed. Define acceptance limits for the specific application and validate them under production conditions.

Why Label Defects Can Escape Detection

An inline inspection system can miss label defects even when its camera captures every product. The image still needs enough contrast, focus, and coverage to reveal a fault. A pale crease on a glossy label may disappear under direct light. A small ink gap near the edge can fall outside the inspection region. Small defects matter.

Line speed adds another challenge. A bottle that shifts slightly on a conveyor may appear skewed, while a loose threshold can accept a weak barcode or broken text. If the system checks only a fixed sample area, damage near a corner may go unnoticed. Transparent film, glare, and changing print colors can make the same defect look different from one run to the next.

Reliable detection depends on testing real production conditions, not just clean sample images. Include labels with wrinkles, smudges, missing print, and off-center placement. Check images from different shifts and lighting conditions, then review false rejects alongside missed defects. A stricter setting may catch more flaws but also stop good products. That trade-off deserves attention. It is easy to assume the setup is finished after a successful test; in practice, packaging changes can quietly expose gaps in the inspection rules.

How to Diagnose Gaps in Inspection Performance

Why Is Your Inline Inspection System Missing Label Defects?

An inspection gap often starts before the camera: glare on glossy film, label drift, or a recipe change can make a defect look normal. Check the reject log by defect type and line speed, then compare it with samples inspected under consistent lighting. If misses cluster on one SKU or shift, review setup records and operator adjustments. A clean dashboard can still hide a blind spot.

Use measurable checks. GS1’s General Specifications apply ISO/IEC 15416 barcode grading, which rates linear barcode quality from 0 to 4. A poor grade can flag weak print contrast or distortion before a scanner fails downstream. That metric does not assess every label element, though. Verify text, position, and artwork separately, and challenge the system with real samples: skewed labels, faint dates, and partial smears. One test set is rarely enough.

Tips: Save confirmed defects and near-misses by type. Re-run them after lighting, speed, or software changes. Check false rejects, too; teams sometimes lower sensitivity to keep the line moving. That trade-off deserves a second look.

Which Changes Can Improve Label Defect Detection

Why Is Your Inline Inspection System Missing Label Defects?

Which Changes Can Improve Label Defect Detection

A fast line can still miss a crooked label, faint print, or a small wrinkle near a bottle seam. The weak point is often not camera resolution alone. Glare, changing package positions, and inconsistent lighting can hide defects from a system that passed setup checks. Separate inspection tasks: verify label presence and position, then inspect text, graphics, and codes. Use angled lighting for reflective stock, and capture samples at normal line speed. A stopped conveyor can make poor settings look reliable.

GS1’s General Specifications use barcode verification methods aligned with ISO/IEC 15416, which scores print quality on a 0.0–4.0 scale. That range gives teams a measurable way to assess barcode quality, but it does not prove that all label artwork is correct. Define defect limits for each product, then challenge the camera with real examples: low contrast, shifted artwork, folds, and partially obscured codes. Record false rejects as well as missed defects. The uncomfortable part: teams sometimes tune systems to reduce rejects and quietly accept blind spots.

Tips: Keep a defect library beside the inspection station. Recheck it after label, lighting, or speed changes. Review borderline images with operators each shift; one sample set may not represent every production condition.

FAQS

Why can an inspection camera miss a label defect?

A camera may capture every bottle, but glare, poor focus, or limited inspection coverage can hide faults. Small defects matter.

How can glossy labels make inspection harder?

Direct light can wash out a pale crease or faint print. Angled lighting may reveal details that glare conceals.

Can conveyor speed affect defect detection?

Yes. At normal speed, a shifting bottle may look skewed, and a small mark may pass before the system assesses it clearly.

Which label defects should teams use during testing?

Test with wrinkles, smudges, missing print, shifted artwork, faint dates, and partly covered codes. Clean samples are not enough.

How can teams find patterns in missed defects?

Review reject logs by defect type, product, shift, and line speed. Compare missed samples under consistent lighting with actual production images.

Does a barcode quality score verify the whole label?

No. A score can help assess barcode print quality, but text, placement, and artwork need separate checks.

Why should teams review false rejects as well as missed defects?

Tighter settings may catch more flaws but stop good products. Lower sensitivity may keep the line moving while hiding defects.

When should inspection settings be checked again?

Recheck after changes to labels, lighting, speed, or software. Keep a defect library nearby. One sample set may not represent every shift.

Conclusion

An inline label inspection system checks products as they move along a production line, using cameras, lighting, and image-processing tools to identify issues such as missing, misaligned, damaged, or unreadable labels. Its effectiveness depends on more than the camera alone: product position, line speed, lighting consistency, image quality, and clear inspection criteria all influence whether defects are detected.

When defects pass unnoticed, ask: why is the inline inspection system failing to detect label defects? The cause may be a poorly positioned camera, reflections or shadows, changing package orientation, inadequate image resolution, or detection settings that are too broad. Reviewing rejected and accepted product images, testing different defect examples, and checking the system under normal production conditions can reveal performance gaps. Improvements may include stabilizing products, adjusting lighting and camera angles, refining inspection thresholds, and regularly validating results so detection remains dependable as production conditions change.

Amelia

Amelia

Amelia is a seasoned marketing professional with a wealth of expertise in our company’s core offerings. With an unwavering passion for driving growth and innovation, she plays a pivotal role in shaping our marketing strategies and enhancing brand visibility. A key aspect of her responsibilities......